Making a Mosaic
This demo was made with Adobe Photoshop (PS). However, the process should be quite the same with other programs like PaintShop, GIMP or similar. Just for reference – my screenshots have a size of 1024x768, if you use different sizes, you'll have to adjust the sizes I refer to in the next steps.
The numbers in [...] refer to the numbered images.
If you want to know more about taking screenshots, please read this demo.
Making the screenshots
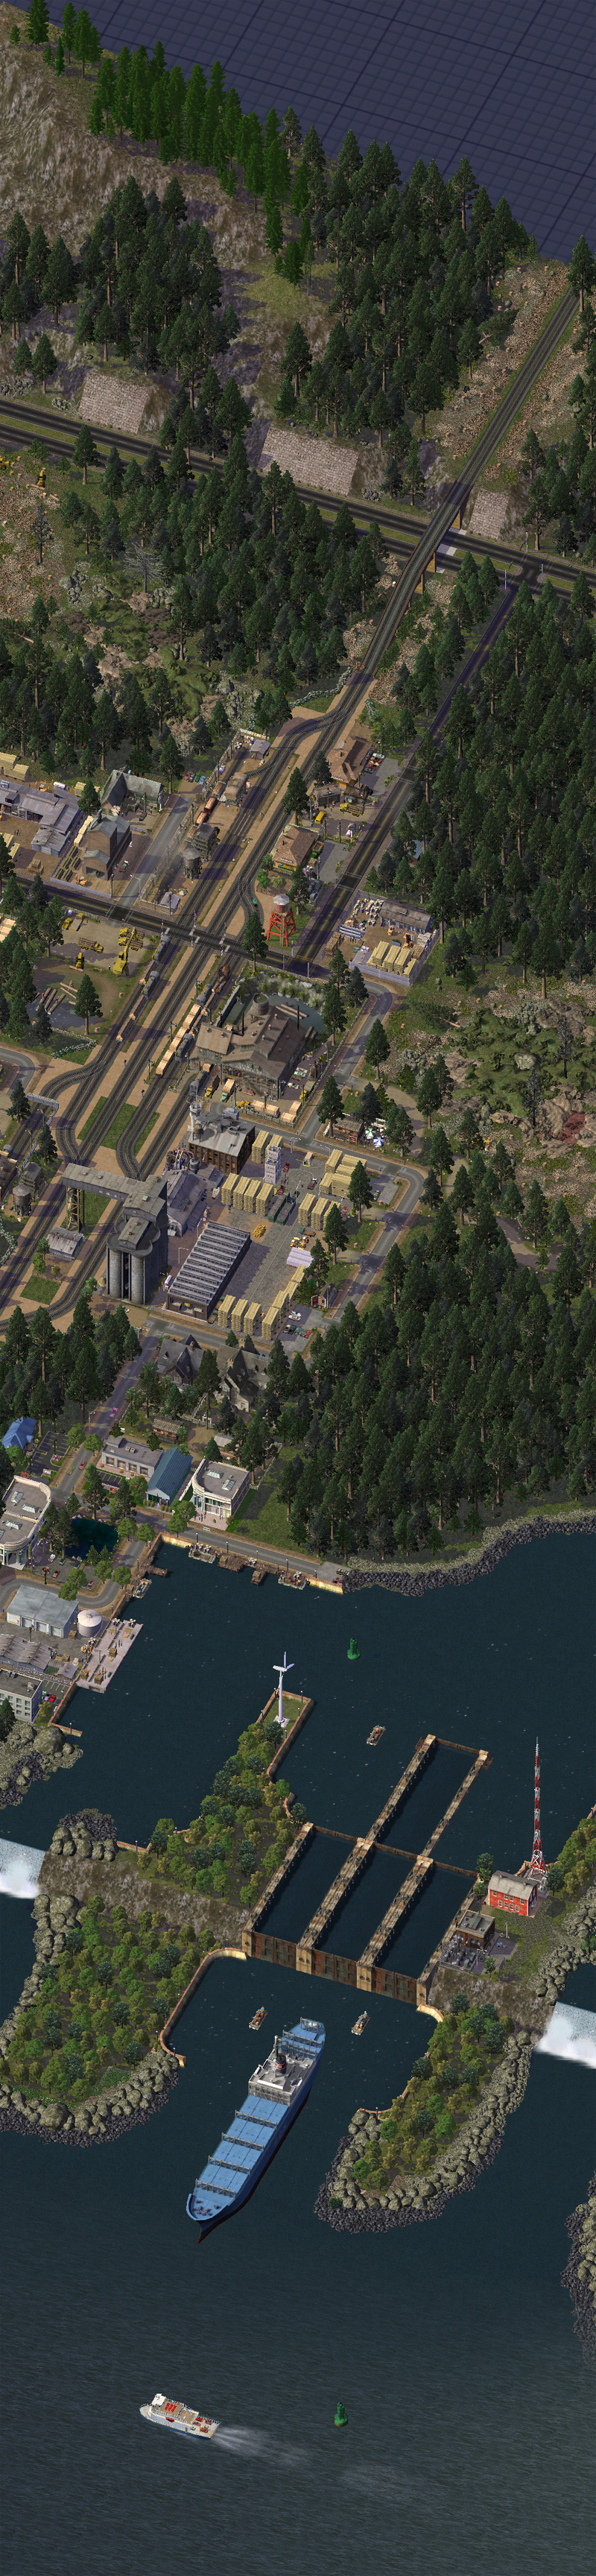
First, get an overview [01] and decide on the section you want to use for your mosaic (orange frame).
Next choose a zoom-level, most probably 4. Level 5 is only suitable if you want to show certain details in full size.
01 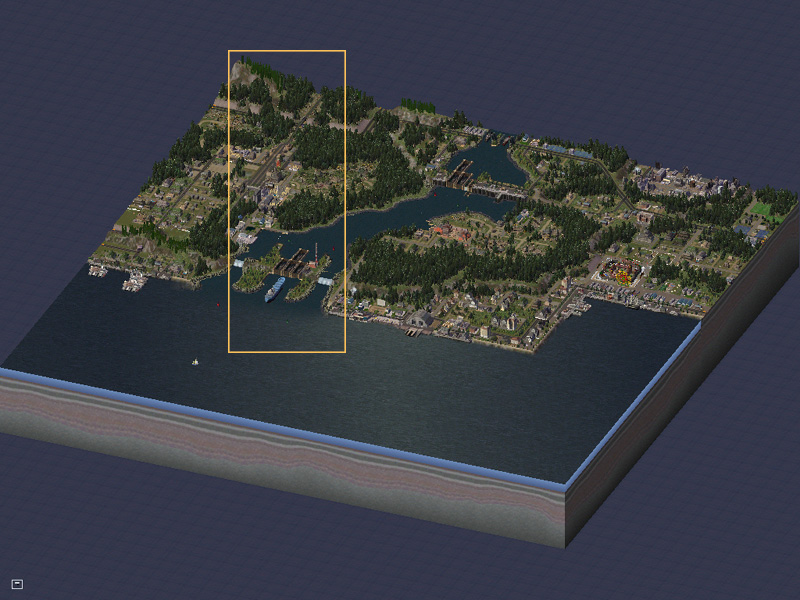
Now take your first screenshot [02], starting at the top left corner of your selection.
02 
From here on a lot of "eyeballing" is involved – search for a feature in your city near the bottom of your first screen (here I used that little brickwall on the left side for orientation). Now scroll up until that feature sits at the top of your screen. For better control use the arrow keys to scroll (you'll have to press the down arrow approximately 7 to 8 times). Make sure not to move the screen to the left or right, you must strictly observe up/down-movements only!
You see the brickwall now on top of the screen [03].
03 
Continue shooting the screens until you have covered the entire selected area (remember, that orange frame). For this demo mosaic I needed 7 screenshots.
Processing the screenshots
First prepare a "New image" (72ppi resolution) with a width of 1024. Height should be 768 multiplied with the number of screenshots. Okay, to make the math easier, I'll say 800 x 7 = 5600.
Your initial setup will look something like this [04] -
04 
Now open your first screenshot in PS, than use the 'Move Tool' to drag (click&move) it into the new image. Press SHIFT while dragging, so the copy will be exactly centered (horizontal and vertical) in the new image. After this close the screenshot-instance, you won't need it anymore for this process.
05 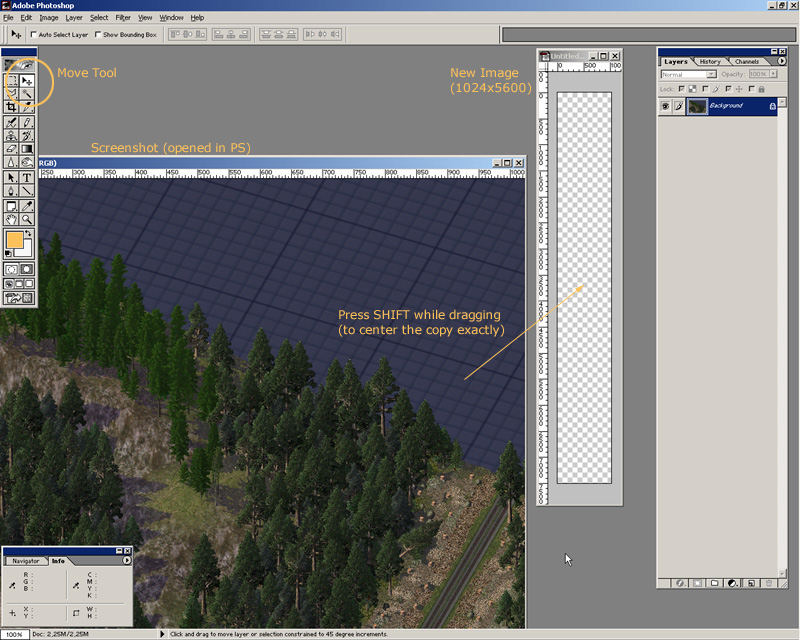
Repeat this step with all seven screenshots. Your new image will now look like this [06], with all the copies stacked on top of each other. So just activate one layer after the other [07] and move the individual copies into its right location as shown in [08], again just moving them up/down with the arrow keys (use SHIFT+Arrow for faster moving). Remember – do not move any of them left or right!
06  07
07 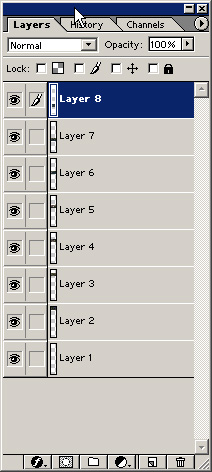 08
08 
Okay, now bring your image up to fullsize and move to the gap between the first and second layer [09]. Find a spot where it will be easy to line up the two images – good elements for that are elements with continuous straight or diagonal lines, like streets, roads or buildings. Here I will use the rail track (orange circle).
09 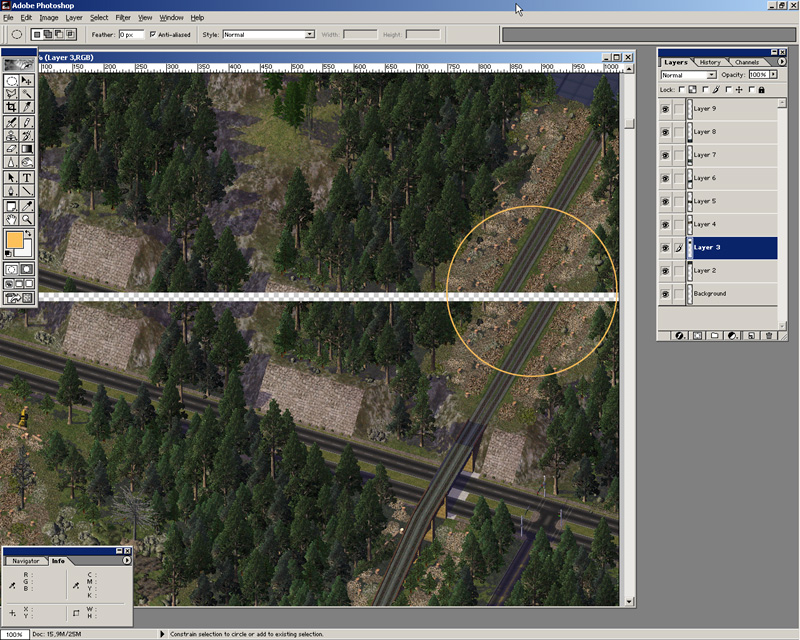
Make sure the proper copy is activated in the layer-palette, then start pushing the second screen up until it covers the first screen up to the point where that rail track matches exactly. I made a selection (dashed line) so you can see the overlapping part well [10].
10 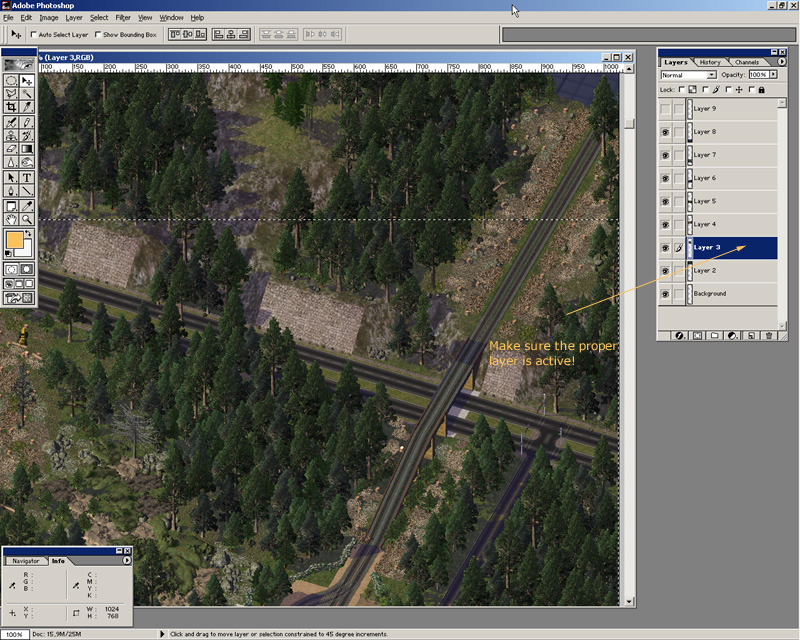
That's basically it :-) Move to the next gap [11], make sure to activate the layer and push it up... Repeat until all the sections are properly lined up.
11 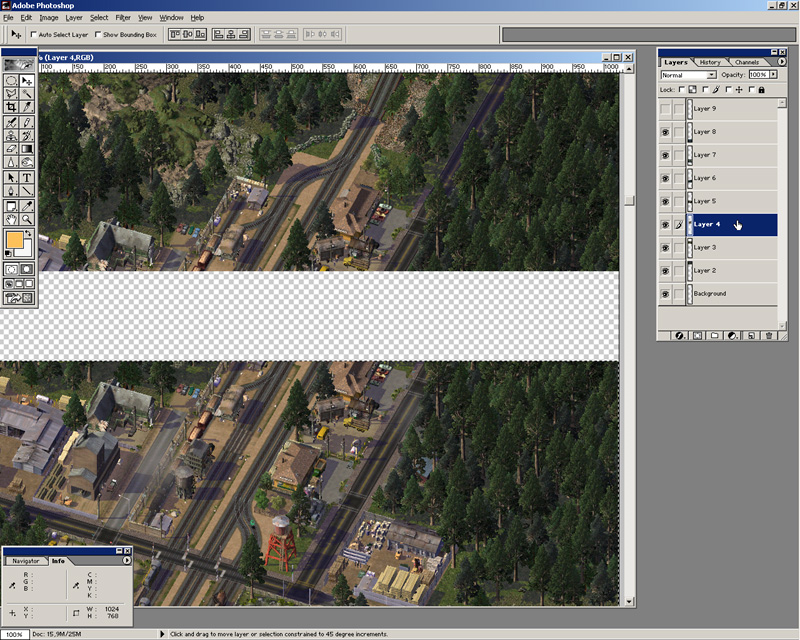
When that's done, zoom out again and crop the complete thing to its needed size [12].
12 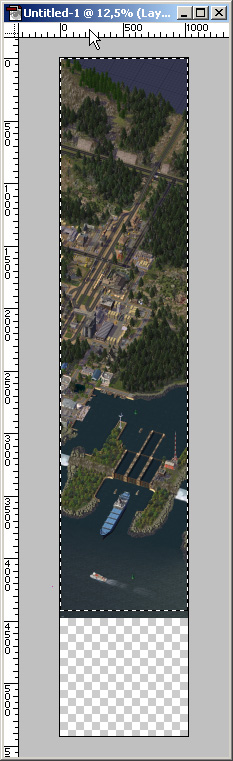
If you have not done so yet, now is a good time to save the whole thing as a *.PSD. That's the one you want to keep for further reference or use. Because now comes the part that I dislike most – adjusting it to the various allowed (smaller) upload sizes, which obscures lots of the fine details *sniff*...
The process itself is easy – because now you have only one image (with numerous layers). So open the 'Image | Image Size...' dialog and set the desired dimensions, in this sample I'll reduce it to a width of 800px [13]. Per default the option 'Constrain Proportions' is active (ticked), so you don't need to worry about figuring the height, PS will do that automatically.
13 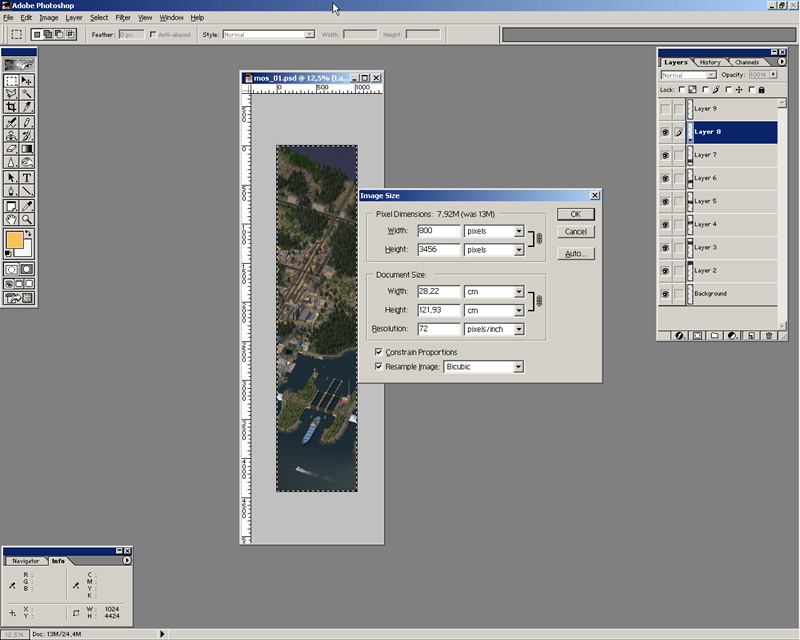
Next you'll want to sharpen the image a bit, because it gets slightly fuzzy during reduction. So get 'Filter | Sharpen | Unsharp Mask' [14] and set a value of 20% in the dialog.
14 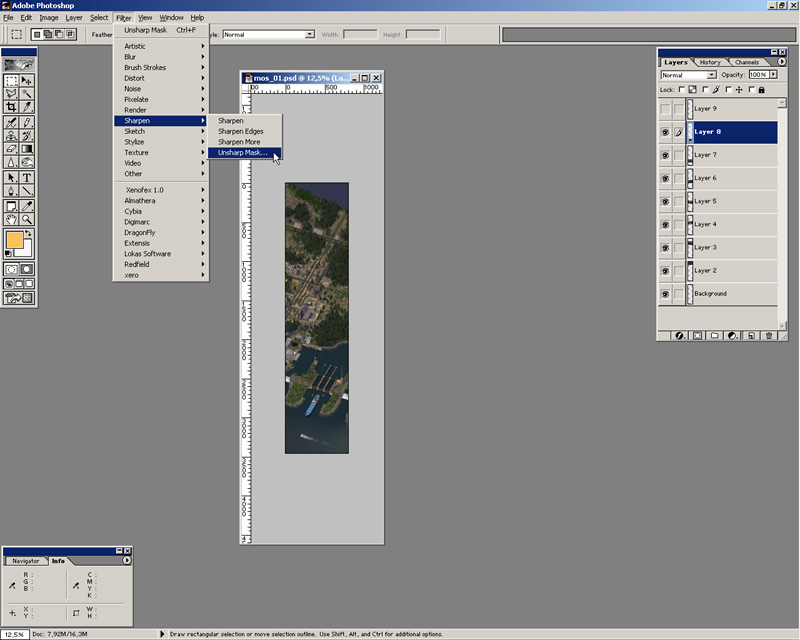
Repeat this step for each layer! The last used filter is always available on top of the menue.
[Normally, I'd first make a new layer, select all, copy merged, paste – and then sharpen the whole thing in one... but I don't want to turn this into a general PS tutorial ;-)]
Now 'Save for Web...', choosing the *.JPG format and maybe crunching the whole thing to ~80%, and you're done.
Okay, before anything else – go into your history and undo everything up to where you resized the image [15]. That way it'll be back again at the original 1024. From here you could now reduce it to 640, sharpen (each layer :), save... and undo again (back to 1024)... and so on.
15 
The Final Mosaic
If you have questions or comments regarding this demo, feel free to join the simpeg forums.